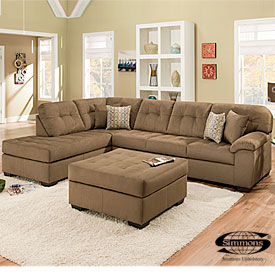
 We found a few good deals recently for new some living furniture at Big Lots. Purchased items were the Simmons Malibu Mocha 2-Piece sectional (with four pillows). We also picked up the matching ottoman (SKUs: 810052897, 81005289).
The “install” just included attaching the feet to these units, but if you’re like us (we couldn’t remember the last time we used the drill), you might find this task a small challenge. Here are some tips/warnings for anyone searching for information on this:
- Don’t bother looking for instructions or a manual. There isn’t one! You should have 4 feet and 8 screws per sectional unit though. Make sure those are with the unit.
- There are no pre-drilled holes.
Tools you will need:
- Needle-nose pliers
- A drill
- 1/8″ drill bit
- A Phillips-head screwdriver bit
- An extender for the drill (the holes in the feet are quite deep) – you may not need this if your drill bits are long enough.
- We also used a razor to cut a few things (keep reading)
After lots of trial and error, this process worked best for us:
- Carefully remove plastic and cloth wrapping. Use the needle nose pliers to pull out any staples that are holding the cardboard or cloth on. Once the wrapping is off, inspect the edges and corners of the bottom of the unit to look for any other staples sticking out that you may have missed. Yank em out.
- Now, look at the corners of the unit. You will need to pre-drill holes into the wood near the corners of the unit. This was complicated for us because there was some extra cotton jammed between the wood and the gray fabric on about 50% of the corners. You won’t be able to drill/screw through this cotton. It twists around the bit and just locks everything in place. Again, not all corners had this problem, only about half of them.
- For the corners that you feel padding between the bottom cloth and wood: use a sharp razor, make a small cut in the gray fabric, and use the pliers to pull out the extra padding jammed down there. When you’re doing it, it will look like you’re pulling a lot of stuff out, but don’t worry… its not even supposed to be there. Just make sure you’re not pulling it out of the sides. We ended up with about a handful of cotton (when compressed) for each corner that had this problem.
- Once you confirm that there is nothing between the wood and the gray fabric on the corners, its time to install the feet.
- We found this very easy to do with two people. One person holds the foot in place, the other drills and then screws. Be sure to set the feet in a few centimeters to hide the lip of the plastic from the top, but also make sure that you keep the feet on the wooden edges, or else the foot will slip inside when weight is applied.
- While the unit is on its side, and the other person is holding the foot and providing support from the other side of the unit, pre-drill your hole with the 1/8″ bit. Reverse the drill direction, pull it out. Attach the screwdriver bit and screw the screw in tight.
- That’s it! Do that for all corners. The ottoman uses the exact same process.
Shame on Big Lots for a) making this more difficult than it needs to be, and b) Not providing instructions for those of us that aren’t very handy 🙂
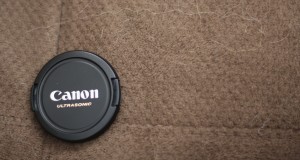
UPDATE (11/5/2013): We’ve had this couch for one year now, and it has held up just fine. We have a large dog that likes to sleep on it, as well as some father-in-laws spending a few nights on it. There is no sagging, or obvious “favorite” spots. The dog hair from our German Shepherd-ish dog comes off with a vacuum attachment. Several folks were asking if the hair gets tangled in the micro-suede fiber, and from what I’ve seen, this isn’t the case. Here’s the best I can do for a closeup shot of the couch pre-vacuuming. Click to enlarge.
And here’s the monster responsible for all this hair, and probably the one who spends the most time on this unit:

