Category Archives: How-to

How to Digitize Your Life

20150826_digitize_your_life_office_text_desat

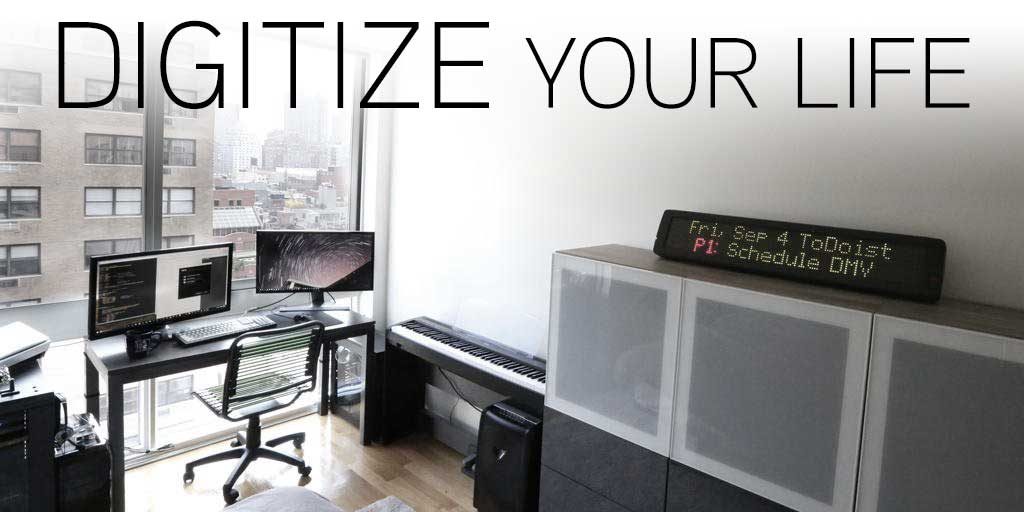
A Step-by-Step guide to scanning, organizing, and storing your paper documents and photos

My life has changed (for the better) by digitizing my personal files that I’ve been lugging around for last 20 years. Not only did I rid my home of three bulky, overflowing file cabinets, I’ve also enhanced the way I access these documents and photos. Imagine being able to:

  • Find information that was in an old hand-written note from a college class you had 10 years ago…. Instantly. From your cell phone.
  • Locate all pictures you’ve ever taken that included a dog – without ever manually specifying that the picture contained a dog!
  • Quickly see all pictures of your great-grandmother, even her baby pictures, all without having to waste time tagging photos.
  • Type a month and a year into Google search, and instantly pull every single piece of mail received during that time.

I’ve outlined the process I’ve been using for almost 8 years below. There are some alternate ways of scanning these days: iPhone apps where you just take a picture using your phone, for example. But I have found that to consistently get uniform and quality results, a desktop scanner is still the way to go.  I also believe it is much faster to use a scanner if you have stacks of documents. The scanner listed above can scan the front and back of about 40 pages at a time. That would take forever on an iPhone!

Step One: Get the gear

I’ve gone through 3 scanners and 2 different shredders in my life, but my recommendations below show you the items that have worked very well for me (multiple years of heavy use without issue). This is the set up I use nearly every day:

  1. A good duplex scanner. This is the most expensive part, but will pay for itself over time, and with a gentle touch, will last for many years. I use (and recommend) a Fujitsu ScanSnap.
  2. A solid shredder (or a secure shredding drop-off service).
  3. A rubber “SCANNED” stamp – this seriously comes in handy!
  4. A free Google Account. We are going to use Google Drive to store your files in the cloud. There are other services available, such as DropBox, OneDrive, or Evernote, but this tutorial will focus on Drive, because I’m very familiar with some of the undocumented “gotchas” when it comes to searching documents in Drive. We will also make use of Google Photos to store and organize our photos, and its nice to have everything on one service, right? For Now, just bookmark drive.google.com and photos.google.com.


Step Two: Plan

For documents, there are two things we need to work out before getting started: our folder structure and our file name convention as they will be stored on Google Drive. This is the hardest part, so don’t skip ahead until you’ve really digested this. While most of this process can be adjusted and “figured out” along the way, screwing up your organization strategy is a royal pain to fix later.

2-1: Deciding a folder structure (or deciding not to have one):

I’d guess that 90% of the time, most people SEARCH to find what they are looking for in Drive (instead of clicking through a hierarchy of folders). But from time-to-time, I like to be able to go into a specific folder and see everything in it – just like a real file cabinet.  I also enjoy the added organization a folder structure gives to my digital file cabinet. Also, if you choose option a, you will find yourself spending much more time on your filename convention. For example, if you do not rely upon a folder structure, you can’t just name a document “2008 Insurance Policy” – without a folder structure, you wouldn’t know anything about that document.. is it a home insurance or car insurance? Was it with State Farm or Progressive? With option a, you’d end up having to specify all of that in filename for every file, and that gets old real fast.  Now choose wisely:

  • Option A: Skip folder organization altogether (not recommended). Simply rely on good filenames and searching the text within the document.
  • Option B: named folder hierarchy for easier browsing / contextual clues

I would recommend Option B for a few reasons:

  • Sometimes it is useful to have a folder full of otherwise unrelated documents (like tax documents for each year)
  • I like to store my receipts by year to make them easier to browse
  • Storing thousands of documents in a single folder causes weird problems

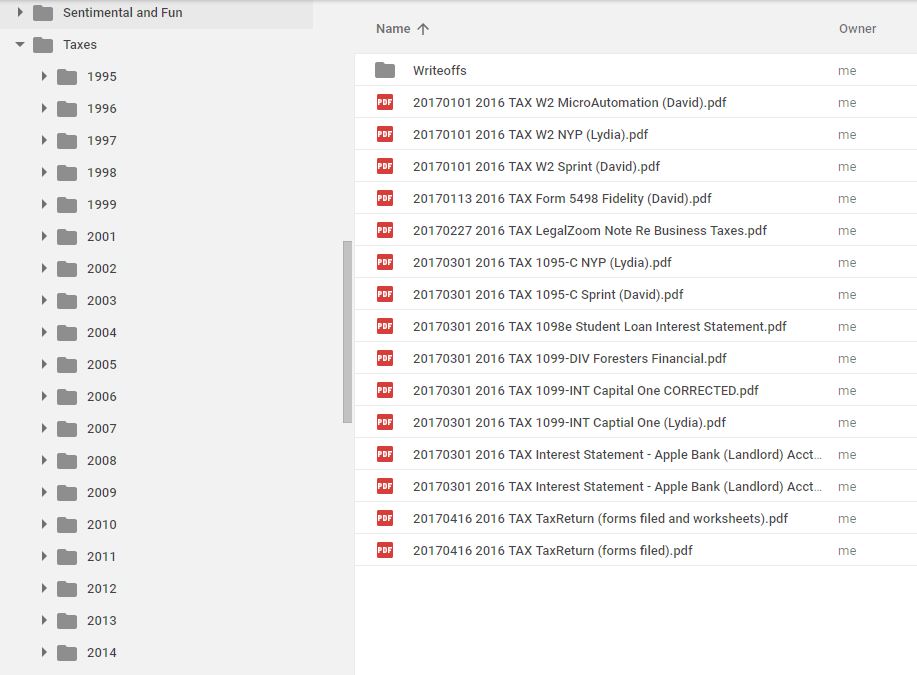
Here is what my tax folders look like (click to enlarge):

When you first open your Google Drive account, there wont’ be any folders listed.

2-2: Deciding a file naming convention:

A few years ago, Google changed the way searches worked within Google Drive. When I started down this path, I chose the following format (don’t do this – keep reading):

YYYYMMDD_DirectCategory_Document_OptionalDetails.pdf (bad – do not do this)

This allowed me to search by date… for example, if I wanted to see everything from May of 2008 (across all folders) I could just search for “200805”

BUT Google has since changed how this works, and does not search within contiguous blocks of text. In other words, the search of “200805” will not result in anything now (unless it was found within the document).

So here is my recommendation for anyone just starting out:

YYYY MM DD DirectCategory DocumentName OptionalDetails OptionalNumber.pdf 

Some examples: 

  • 2017 08 15 New York Life IRA Statement.pdf
  • 2017 09 01 Receipt Walgreens 1.pdf
  • 2017 09 01 Receipt Walgreens 2.pdf  (Two Walgreens receipts in the same day)
  • 2017 09 16 Receipt Target Corner Table.pdf

Add dashes to your personal preference, but just remember to use spaces to make the titles searchable:

  • 2017 08 15 – New York Life – IRA Statement.pdf
  • 2017 09 16 – Receipt – Walgreens.pdf

This format allows searches like “2008 05” to find all May 2008 documents.

Step Three: Scan

My own personal process is as follows:

  • Use the ScanSnap manager  / button on the scanner to scan an indexed PDF, name the file properly in ScanSnap interface.
  • Once file is saved to disk, I open it in Adobe acrobat to make any adjustments – including deleting blank pages, fixing the orientation of some pages, etc. Save file again.
  • Once I am done scanning for the day, I use the Google Drive web interface to upload the files.
  • I move the uploaded files off into an archive directory that I keep around for a few months before deleting.

Some other tips:

  • Last I checked, Google won’t index PDF files larger than 10MB. Adobe Acrobat has a nice feature which allows you to split a PDF by size.  When scanning in a large document or notes from a class, I first make the monster PDF, then break it down in MB chunks, and then upload both versions.
  • Organize your pile of documents before scanning. Scanning single papers at a time is a real time killer.
  • Keep your scanner oiled – you also may need to replace the rubber roller feeder after your first 100k sheets or so.

Step Four: Upload

  • I recommend using the Google Drive web interface to upload your files.
  • After a near disaster using the Google Drive windows application, I’ve grown to distrust any sort of synchronizing mechanisms when it comes to huge libraries of files. Moving around thousands of files (or renaming folders) on physical disk could possibly take a long time. Trying to sync to Google while that file copy or move operation is in flight is a recipe for disaster. Google will think half of your files are gone, and creates a real mess.

Step Five: Shred

For security purposes, I like to shred nearly everything once I’m sure my library is working well. A few physical items I hang on to:

  • IDs (duh)
  • Any kind of certificates (professional certs, etc)
  • Anything notarized
  • Anything sentimental – sometimes its nice to actually hold the newspaper article or whatever

Step Six: Back up

Coming soon!


Tempurpedic Ergo Plus Remotes

How to program two remotes to a TempurPedic Ergo Bed

Tempurpedic Ergo Plus Remotes
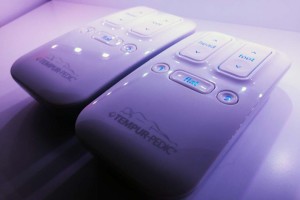
Programming an additional remote to operate our TempurPedic Ergo Plus adjustable bed was not very intuitive, so here are the instructions on how to add another remote control to your unit:

  1. Buy an extra remote, install batteries.
  2. Under the bed, press and hold the LEARN button on the control unit  – hold this for 3 seconds.
  3. Now let off the button for about 1 second, then press (not hold) the button 2 times. This activates the second channel for association.
  4. Press any button on the new remote control.
  5. If the process succeeds, the LEDs on the power brick and control unit will turn off.
  6. Wait 10 seconds and then test.

Hopefully this saved you a call into their 800 number. No more fighting with your spouse over who gets the bed remote! Rejoice!

How to Manually Update Plex Media Server on Ubuntu

Since the repositories are not updated often, it is best to manually download and install the updated versions of Plex Media Server manually. You may be forced to do this if you’ve seen the “An update is available. Please install the update manually.” error:

An Update Is available. Please install the update manually.

This is fairly simple (performed on Ubuntu 14.04):

  1. Backup: Consider backing up your metadata and preferences.  Updating this package should not affect either, but better safe than sorry.  Plex wiki on what to back up.
  2. Grab the file and get it to the server: Now you need to get the new package onto the server. You can do one of two things:
    Transfer using WinScp: Go to the Plex Media Server download site, log in, and download the latest version (be sure to check under “PlexPass”), then manually move it onto the server using a program like WinSCP.
    OR…
    Directly download the file to the server: Figure out the URL for the file to be downloaded, and then just use wget on the Linux server (this is just an example URL – find the current version!):

    plexuser@plexserver:~$ wget https://downloads.plex.tv/plex-media-server/0.9.11.7.803-87d0708/plexmediaserver_0.9.11.7.803-87d0708_amd64.deb

  3. Install: Pretty easy! Just install the .deb file:

    plexuser@plexserver:~$ sudo dpkg -i plexmediaserver_0.9.11.7.803-87d0708_amd64.deb

    You’ll get something that looks like this:

    plexuser@plexserver:~$ sudo dpkg -i plexmediaserver_0.9.11.7.803-87d0708_amd64.deb
    [sudo] password for plexuser:
    (Reading database ... 198842 files and directories currently installed.)
    Preparing to unpack plexmediaserver_0.9.11.7.803-87d0708_amd64.deb ...
    plexmediaserver stop/waiting
    Unpacking plexmediaserver (0.9.11.7.803-87d0708) over (0.9.11.5.774-760cb52) ...
    Setting up plexmediaserver (0.9.11.7.803-87d0708) ...
    plexmediaserver start/running, process 8686
    Processing triggers for bamfdaemon (0.5.1+14.10.20140925-0ubuntu1) ...
    Rebuilding /usr/share/applications/bamf-2.index...
    Processing triggers for desktop-file-utils (0.22-1ubuntu2) ...
    Processing triggers for mime-support (3.55ubuntu1) ...
    Processing triggers for gnome-menus (3.10.1-0ubuntu2) ...
    Processing triggers for ureadahead (0.100.0-16) ...
    plexuser@plexserver:~$

  4. Verify: That’s really all there is to it. The command above should have restarted your server automatically for you. On your Plex server web panel, navigate to: Settings->Server to verify that you’re on the latest version!
    Plex Version 0.9.11.7 Up to date

Synology DS1513+ NAS w/LAG – The ultimate home storage set-up

1513_and_SG300
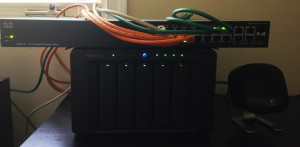
Want to get serious with your home storage set up? The 1513+ NAS server is for you.  With 5 drive bays, 4 network interfaces, and scaling up to 60TB, this thing is overkill for most people (probably including me).

I am using this as general home storage, and to store HD security camera footage.  I have Linux, Mac, and Windows workstations in my home, and this NAS fits my needs perfectly.  I’ve been up and running for about three weeks now, with no major complaints.  The Synology OS and the web-front end is very well-engineered, and I haven’t run into any bugs at all.

Network and Link Aggregation (LAG)

Along with my Synology Filestation purchase, I also upgraded my home network.  In order to benefit from the 4 Gigabit network ports on the back of the Synology, a switch capable of link aggregation is required. Specifically, the switch needs to adhere to the IEEE 802.3ad standard.

After going back and forth between a layer 2 switch and a layer 3, I finally just decided to spend a little extra and went with the Cisco SG 300-20 managed switch. This switch is awesome. If you’re not a network engineer familliar with IOS, there is a very feature-rich web front end that I used for everything. I also replaced all of my older CAT5 cables in the house with some nice new (and cheap) CAT6. Here’s what my super-charged home network looks like these days:

homenetworkpng

Setting up LAG (link aggregation, teaming, binding, bonding, whatever you want to call it) was a breeze on both the Synology and the switch:

  1. Plug in all four network cables from the Synology into four ports on the switch.
  2. Configure link aggregation in the Synology first (via Control Panel -> Network). Choose the type of aggregation, and configure your IP address, etc.
  3. On the Cisco, configure a LAG group and assign the four ports to that group. I set the load balance to MAC.
  4. I later turned flow control on for the LAG ports, as I was seeing some packet loss in the Synology logs. You may need to experiment a bit here with your switch and clients. Also keep in mind that it takes quite a bit of traffic/activity to happen for those LAG algorithms to start being efficient.  I didn’t see any noticeable improvement when testing concurrent speeds at first. Only after a lot of testing and activity did I see more than 1000 Mb/s out of the filestation.

It is important to note that many people will not benefit from link aggregation.  LAG won’t make a difference in the transfer speeds to/from a single computer.  You’re not building a fatter pipe with LAG, you’re simply allowing multiple interfaces to operate as one, which in turns allows you to push to multiple computers concurrently at a higher rate.  When only interacting with one client, the port speed will always be Gigabit (unless you have a LAG set up on the client, and a 10Gig switch!).  However, if you’re streaming HD movies or constantly moving large files to or from multiple clients, this is a great feature.

Storage

I went with 5x 4TB Seagate NAS drives. These babies gave me just under 15 usable in the Synology Raid configuration, and were on the compatibility list from Synology. No drive issues yet, though I feel one of them may be failing, as once in a while I will hear a click, then each drive seems to do a cycle with the green light turning off momentarily on each drive, left-to-right. Drive failure is not surprising when dealing with 20TB. In fact, due to my previous history with buying new drives, I expected at least one to be DOA, but that was not the case! I will post updates here as things progress.

All in all, a great device. My only complaint was the “Surveillance center” app only included a license for a single camera. Buying more licenses is not cheap at all. Instead of buying more, I just re-purposed an old windows server to manage the cameras and the footage file management, then used the Synology as mounted storage on my security cam server. Here’s my final set set up:

lag_screenshot

CompTia Security+ Exam Tips

CompTia Security+While the exam is still fresh in my head, I going to hand out some tips and suggestions for the CompTia Security Plus exam.  I took the test one time, and passed with a 834/900.

My Previous experience:

  • A few weeks ago, I got my MTA Security Fundamentals, along with the CompTia Network+.  The Network+ really came in handy for Security+.
  • 10+ years in telecom, IS/IT/Development roles
  • Lots of other certs… I’ve taken nearly all MTA certifications now, mostly thanks to WGU (Washington Governors University).

My study time/process/tools:

  • I spent about 4 days preparing for this exam.
  • My university provided an online tool called LabSim, provided by “TestOut”. This was a mix of videos, tables, quizzes, and hands-on simulated exercises.  I did not really feel this was efficient use of my time, but 90% of my study time was spent using this source.
  • I also had access to a UCertify Course as provided through WGU. I avoided this source.
  • Professor Messer’s Security+ videos on Youtube. I watched about 10 of the ~200 of them. Those are really great, especially if you need a clear explanation on a topic you’re not getting.

What to focus on:

  • If you don’t do ANYTHING else, at least memorize the protocols (and where they are used), ports, associated hashing or crypto algorithms, and categorization.  The thing that helped me the most was the fact that I had all of the symmetric and asymmetric protocols and algorithms fully memorized.  In fact, before I even started the test, I jotted them all out on the scratch paper, under their proper heading. I referred back to this table probably about 20 times.
  • Know the “strongest” configuration for all areas: wireless networking,  remote authentication, etc.  There were quite a few “what is the most secure configuration” type questions.
  • Don’t skip the chapter on the risk assessments and calculations… I skipped it and it cost me a few questions, I think.  There were probably 7 or 8 questions about risk management, documentation and process.
  • Know the terms involved with security threats.  I was tempted to skip the chapters discussing worms and viruses, but I’m glad I didn’t because there were probably 20+ questions on phishing, worms, viruses, malware, spear fishing, vishing, pharming, rootkits, backdoors, trojan horses, etc.  Make sure you REALLY know the difference between these, and the appropriate response to these security threats.

What to skip:

  • The LabSim online training course I was using (provided by “TestOut”) went into a LOT of detail and hands-on exercises that I felt wasted a lot of time.   They had me doing many tasks that were unrelated to security, such as dinking around with AD, adjusting network settings, etc.  While it may help give context to some of the concepts, just keep in mind that every question on the real exam asked a SECURITY question.  For example, on the real exam, I was never asked to configure a RADIUS server or anything close to that. But I WAS asked many, many questions regarding the protocols, ports, and algorithms used with RADIUS.

How to get your money back from eFax

eFax is a huge scam. That isn’t news to anyone. Between the harassing calls from eFax and their shady billing practices, I’m not sure how they are still in business. After trialing their service, and then cancelling within my trial, I received a cancel confirmation email. But this didn’t stop eFax (J2 Global Inc) from charging my credit card 15 days later (charge appeared as “J2 *EFAX PLUS SERVICE 323-817-3205 CA”).

efax_charge

The chat and phone support provided by eFax is awful, and you won’t get anywhere by contacting them. If eFax scammed you, here’s how to get your money back very quickly:

  1. Document any contact with eFax support. I saved the chat logs, and all emails from them.
  2. Request a refund with eFax: If eFax wrongly charged your card, request a refund via their online chat. Save this chat log by copying and pasting. If you’d rather call, the number is 800-287-3499. Keep in mind you can not legally record the conversation without telling the other party on the phone.
  3. Submit a BBB complaint: You need to do this on the local BBB site. For J2/eFax, it is the LA office. First, look up the company using this information: J2 Global, Inc – 6922 Hollywood Blvd. Suite 500, Hollywood, CA 90028. Phone: 888-760-1112. Be very detailed. Outline the date that you signed up, the date that you cancelled, and when your card was charged. Demand that the company issue a full refund and close your account as a resolution.
  4. Do a charge-back: After submitting the complaint, I got a full refund to my card the very next day. If you do not get any results with the BBB after a week, or if you don’t even want to bother with any of it, just contact your credit card company and dispute the charge. If you have a half-way-decent credit card (Amex), they’ll just refund your money without too many questions.
  5. Small claims court: If you really want to screw with this company and have a well-documented case, consider a small claims case. You can file in your local court (you don’t need to fly to California). Small claims courts are designed to proceed without lawyers, so just bring your documented case. The company may ask for the case to be moved to a higher-level court, but it will at the very least create a headache for them.

Here is the response received from eFax within 24 hours of filing the BBB complaint:

Our customer contact data shows that the consumer had contacted eFax® support via chat on December 18, 2012, and requested to close his account. However, due to anomaly the cancellation was not completed and the consumer mistakenly incurred a charge. We have since corrected the error and completed the closure of the consumer’s account. Additionally, we processed a refund of $16.95 (consisting of all charges incurred) to the consumer’s affected credit card. The Collection Number for the reimbursement is XXXXXXX. The refund should be reflected on the consumer’s account shortly and is dependent on the consumer’s credit card provider. We apologize for any misunderstanding and any inconvenience it may have caused. We appreciate the consumer’s patience, as well as understanding in this matter.

Hidden Tethering App in App Store! Hurry!

tether
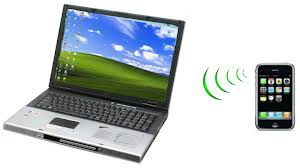
If you have an unlimited data plan (AT&T), and don’t want to jailbreak your iphone, act fast, because there is an app in the App store that has tethering as a hidden feature. Somehow this app flew under Apple’s radar.

The app is called FlashArmyKnife and you can get it by clicking here.

Some quick instructions to access the hidden tethering feature in Windows 7:

  1. Open the Network and Sharing Center
  2. Set up a new connection
  3. Choose “set up wireless ad-hoc network”
  4. Create the network
  5. On the iphone, go to WiFi settings and choose the new network you made
  6. Open the FlashArmyKnife app on the iphone
  7. This is where you start to access the hidden feature: open the calculator part of the app, then press: 1642, M+, C, 1452, M+, C, 1943, M+
  8. Now go to the web tab in FlashArmyKnife and load any site
  9. Back in the iPhone Wifi settings, open the network details. If you see an IP address, take note of it, and you’re on to the next step. If you don’t see an IP yet, try entering the digits again into the calculator (step 7) and loading a site.
  10. To set up the computer, go to Internet Options, then click the connection tab and then “LAN Settings”
  11. Click the checkbox for Proxy server, and enter the IP that you saw on the iPhone. Use 6667 for the port.
  12. Click the “Advanced” button and then uncheck “use the same proxy server for all protocols” option.
  13. Enter the IP again for the socks address, with port 6668. Click okay out of everything.
  14. Back on your phone, open the app again and back to the calculator. Press “C” and then put this string in again: 1642, M+, C, 1452, M+, C, 1943, M+
  15. You should be all set! Just keep that app running, and turn off the autolock on your iPhone, and you should be able to tether away!

Some more help can be found in this video or this link.

How to nuke someone’s DropBox

dropboxDoes your worst enemy have a Dropbox account? This nasty trick may be your path to digital revenge, if your revenge is worth 800 dollars. This information is for hypothetical argument.  Do not do this in real life.

  1. Go get a DropBox for Teams account.
  2. Invite your enemy to the Team account… they will be enticed by the 1+ TB space. If they don’t accept the invite, you’re SOL.
  3. After they accept the invite, log in and revoke their access to your team. This will delete not just their team account, but their entire personal dropbox account as well! 

This is not a bug, hack or exploit, but rather a documented function of how this is supposed to work. Use at your own risk…. if your revenge is really worth $800.

Malibu Mocha Sectional (and other Big Lots furniture) Install Tips

We found a few good deals recently for new some living furniture at Big Lots. Purchased items were the Simmons Malibu Mocha 2-Piece sectional (with four pillows). We also picked up the matching ottoman (SKUs: 810052897, 81005289).

The “install” just included attaching the feet to these units, but if you’re like us (we couldn’t remember the last time we used the drill), you might find this task a small challenge. Here are some tips/warnings for anyone searching for information on this:

  • Don’t bother looking for instructions or a manual. There isn’t one! You should have 4 feet and 8 screws per sectional unit though. Make sure those are with the unit.
  • There are no pre-drilled holes.

Tools you will need: 

  • Needle-nose pliers
  • A drill
  • 1/8″ drill bit
  • A Phillips-head screwdriver bit
  • An extender for the drill (the holes in the feet are quite deep) – you may not need this if your drill bits are long enough.
  • We also used a razor to cut a few things (keep reading)

After lots of trial and error, this process worked best for us:

  1. Carefully remove plastic and cloth wrapping. Use the needle nose pliers to pull out any staples that are holding the cardboard or cloth on. Once the wrapping is off, inspect the edges and corners of the bottom of the unit to look for any other staples sticking out that you may have missed. Yank em out.
  2. Now, look at the corners of the unit. You will need to pre-drill holes into the wood near the corners of the unit. This was complicated for us because there was some extra cotton jammed between the wood and the gray fabric on about 50% of the corners. You won’t be able to drill/screw through this cotton. It twists around the bit and just locks everything in place. Again, not all corners had this problem, only about half of them.
  3. For the corners that you feel padding between the bottom cloth and wood: use a sharp razor, make a small cut in the gray fabric, and use the pliers to pull out the extra padding jammed down there. When you’re doing it, it will look like you’re pulling a lot of stuff out, but don’t worry… its not even supposed to be there.  Just make sure you’re not pulling it out of the sides. We ended up with about a handful of cotton (when compressed) for each corner that had this problem.
  4. Once you confirm that there is nothing between the wood and the gray fabric on the corners, its time to install the feet.
  5. We found this very easy to do with two people. One person holds the foot in place, the other drills and then screws. Be sure to set the feet in a few centimeters to hide the lip of the plastic from the top, but also make sure that you keep the feet on the wooden edges, or else the foot will slip inside when weight is applied.
  6. While the unit is on its side, and the other person is holding the foot and providing support from the other side of the unit, pre-drill your hole with the 1/8″ bit. Reverse the drill direction, pull it out. Attach the screwdriver bit and screw the screw in tight.
  7. That’s it! Do that for all corners. The ottoman uses the exact same process.

Shame on Big Lots for a) making this more difficult than it needs to be, and b) Not providing instructions for those of us that aren’t very handy 🙂

UPDATE (11/5/2013): We’ve had this couch for one year now, and it has held up just fine.  We have a large dog that likes to sleep on it, as well as some father-in-laws spending a few nights on it.  There is no sagging, or obvious “favorite” spots.  The dog hair from our German Shepherd-ish dog comes off with a vacuum attachment. Several folks were asking if the hair gets tangled in the micro-suede fiber, and from what I’ve seen, this isn’t the case. Here’s the best I can do for a closeup shot of the couch pre-vacuuming. Click to enlarge.

Malibu Mocha Couch Dog Hair

And here’s the monster responsible for all this hair, and probably the one who spends the most time on this unit:
Dog on Malibu Mocha Couch