Category Archives: iPhone

iPhone Update Version 9.3.5

Update your iPhone right now

iPhone Update Version 9.3.5A chain of Zero-day exploits was used to target a human-rights defender in the United Arab Emirates.  The researchers describe the process of simply texting a link to an iPhone, allowing them to remotely install malicious spyware to any iPhone from iOS 7 to the brand new iOS 9.3.4! Remotely jail-breaking an iPhone from a link or SMS is about the worst kind of exploit you can have.

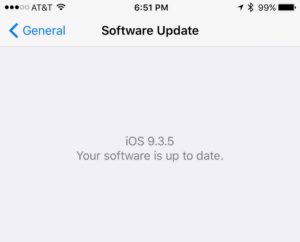
And there is, of course, no doubt that OUR government makes use of these kind of back-doors all day long, but with this one being discussed in the wild, it is only a matter of time before it spreads like wildfire. Apple responded promptly to the notification given by the research team, and have pushed iOS 9.3.5 in response.

Anyway, go to: Settings->General->Software Update and get 9.3.5!


How to Install SiriProxy on Ubuntu 12.10

Just got done installing SiriProxy on Linux Ubuntu 12.10.  I had to make a few minor tweaks along the way, so perhaps this updated guide will be helpful to someone.

  1. Do this first: Open a terminal server (command line from here on out). Update apt-get:
    user@ubtunu:~$ sudo apt-get update
    user@ubuntu:~$ sudo apt-get install libxslt1.1 libxslt-dev build-essential xvfb git-core curl libyaml-dev libssl-dev
  2. Turn off dnsmasq: The latest version of SiriProxy comes with its own DNS server, so there is no need to install dnsmasq like some older instructional tutorials might recommend. In fact, it will really muck things up if it is installed. Ubuntu has dnsmasq on in a default installation (used by the “simple” network config tool: NetworkManager), so we will need to stop it and shut it off for good. First see if its running, and stop (kill) it if it is:
    user@ubtunu:~$ pkill dnsmasq

    Now we need to stop it from starting again, by turning it off in this file: /etc/NetworkManager/NetworkManager.conf – comment out the dns line like so:

    #dns=dnsmasq

    Now just restart networking:

    user@ubuntu:~$ sudo restart network-manager
  3. Install RVM:
    user@ubuntu:~$ curl -L https://get.rvm.io | bash -s stable --ruby

    Update your environment variables:

    user@ubuntu:~$ echo '[[ -s "$HOME/.rvm/scripts/rvm" ]] && source "$HOME/.rvm/scripts/rvm"' >> ~/.bashrc
    user@ubuntu:~$ echo 'export PATH=$HOME/.rvm/bin:$PATH' >> ~/.bashrc
    user@ubuntu:~$ . ~/.bashrc
  4. Install Ruby:
    user@ubuntu:~$ rvm autolibs enable
    user@ubuntu:~$ rvm install 2.0.0
    user@ubuntu:~$ rvm use 2.0.0 --default
  5. Install SiriProxy: This is where I had to take a different path from the installation instructions provided in the github read-me. The version that was installed using gem install had a bug preventing the DNS server from working, so I needed to get the latest source and install from that. Be sure to replace the version number with the version downloaded in some of the steps below:
    user@ubuntu:~$ mkdir SiriProxyLocal
    user@ubuntu:~$ cd SiriProxyLocal
    user@ubuntu:~/SiriProxyLocal$ git clone https://github.com/plamoni/SiriProxy.git
    ...bunch of stuff...
     
    user@ubtunu:~/SiriProxyLocal$ gem build siriproxy.gemspec
    ...bunch of stuff...
     
    user@ubtunu:~/SiriProxyLocal$ gem install siriproxy-0.5.3.gem
    ...bunch of stuff...

    You should see a message telling you that your gem has been installed. Nice!

  6. Configure and a few last things:
    user@ubuntu:~/SiriProxyLocal$ cd ~
    user@ubuntu:~$ mkdir .siriproxy
    user@ubuntu:~$ cp SiriProxyLocal/config.example.yml .siriproxy/config.yml
    user@ubtunu:~$ vi .siriproxy/config.yml

    Edit this config file, replacing the “listen” IP address with your own. The upstream dns servers are important too.. if they aren’t set like below, set them. These are Google’s DNS servers that everything will pass through to (except the Siri address):

    listen: 192.168.0.17
    port: 443
    log_level: 1
     
    #Create an array of DNS servers for use by internal DNS server and resolving guzzoni.apple.com
    upstream_dns: [8.8.8.8, 8.8.4.4]
     
    #Set your computer's IP for use by the internal DNS server
    # server_ip: 192.168.1.100
     
    #Set effective user when running as root. Supply a non-privileged user (such as 'nobody')
    # user: nobody
  7. Generate the certs
    We need to generate a certificate to install to your phone (don’t worry, this is easy):

    user@ubuntu:~$ siriproxy gencerts

    This puts a file here: ~/.siriproxy/ca.pem
    We need to install this to the phone. To do this, I installed WinSCP, copied onto my windows machine, and emailed it to my phone as an attachment. There is probably a way to do this from command line, but I didn’t want to mess with setting up mail on this Ubuntu machine. Once you have it in your email, open the file from your phone and “Accept” the security warning as a trusted cert.  Having this extra cert won’t harm anything on your phone.

  8. Start the server!
    Replace the XX.XX.XX.XX with the ip address of the machine (hint: use ifconfig to see the IP)

    user@ubuntu:~$ rvmsudo siriproxy server -d XX.XX.XX.XX

    Which should produce something like this:

    WARN: Unresolved specs during Gem::Specification.reset:
          rake (>= 0)
    WARN: Clearing out unresolved specs.
    Please report a bug if this causes problems.
    [Info - Configuration] Loading plugins -- If any fail to load, run `siriproxy bundle` (not `bundle install`) to resolve.
    [Notice - Server] ======================= WARNING: Running as root =============================
    [Info - Server] DNS Server started, tainting 'guzzoni.apple.com' with 192.168.0.17[Notice - Server] You should use -l or the config.yml to specify and non-root user to run under
    [Notice - Server] Running the server as root is dangerous.
    [Notice - Server] ==============================================================================
    [Info - Server] Starting SiriProxy on 192.168.0.17:443...
    [Info - Server] DNS server is not running yet, waiting 1 second...
     
    [Info - Server] SiriProxy up and running.
  9. Configure and test your phone:
    This one is easy, just set your “DNS” entry on your wifi connection to your Ubuntu machine’s IP.  Now you should be able to watch the screen, and test SiriProxy by saying “Test Siri Proxy” to Siri!

If you want to start messing around with plugins, the guide here is a good start.  If anyone has any hiccups on a fresh Ubuntu install, let me know and I’ll make corrections/updates. Have fun!

Hidden Tethering App in App Store! Hurry!

tetherIf you have an unlimited data plan (AT&T), and don’t want to jailbreak your iphone, act fast, because there is an app in the App store that has tethering as a hidden feature. Somehow this app flew under Apple’s radar.

The app is called FlashArmyKnife and you can get it by clicking here.

Some quick instructions to access the hidden tethering feature in Windows 7:

  1. Open the Network and Sharing Center
  2. Set up a new connection
  3. Choose “set up wireless ad-hoc network”
  4. Create the network
  5. On the iphone, go to WiFi settings and choose the new network you made
  6. Open the FlashArmyKnife app on the iphone
  7. This is where you start to access the hidden feature: open the calculator part of the app, then press: 1642, M+, C, 1452, M+, C, 1943, M+
  8. Now go to the web tab in FlashArmyKnife and load any site
  9. Back in the iPhone Wifi settings, open the network details. If you see an IP address, take note of it, and you’re on to the next step. If you don’t see an IP yet, try entering the digits again into the calculator (step 7) and loading a site.
  10. To set up the computer, go to Internet Options, then click the connection tab and then “LAN Settings”
  11. Click the checkbox for Proxy server, and enter the IP that you saw on the iPhone. Use 6667 for the port.
  12. Click the “Advanced” button and then uncheck “use the same proxy server for all protocols” option.
  13. Enter the IP again for the socks address, with port 6668. Click okay out of everything.
  14. Back on your phone, open the app again and back to the calculator. Press “C” and then put this string in again: 1642, M+, C, 1452, M+, C, 1943, M+
  15. You should be all set! Just keep that app running, and turn off the autolock on your iPhone, and you should be able to tether away!

Some more help can be found in this video or this link.

The non-existent iPhone alarm time-out setting

iPhone AlarmI’ve come to love my iPhone 4. I feel it truly is a game-changer. I use it as my phone, GPS, remote control, instant messenger, web browser, schedule book, and alarm clock .But if I could change one thing about it, I would fix the limited alarm clock abilities.

The most annoying thing in the world is to come out of the shower, or from anywhere after leaving my iPhone alone in a room while the alarm was going off, to find the alarm STILL buzzing away, 30 or 45 minutes later, with my battery just about dead.

Apple, please just add a simple configuration in the alarm edit screen to allow how LONG we would like the alarm to sound to be set.

And, yes, I know there are alarm-clock apps out there, even free ones, that will accomplish this. But this seems like a simple enough request for Apple. And I’m sure everyone else in my house would appreciate not listening to my iPhone buzz away for hours on end.